If you have the slim USB CCD, you also need these instructions.
If you have the High Resolution CCD, you also need these instructions.
If you have the Laue neutron camera, you also need these instructions.
If you have a standard NeutronOptics camera, you need these instructions instead.
ASCap.vbs now
works reliably for all versions of Windows from Win-XP to Win-10.
If you have a problem, download the latest ASCap.txt. It may have already been fixed.
ImageJ for ASCOM: Tomography to Laue Diffraction
ImageJ-for-ASCOM is copyright but free; even if you don't have one of our cameras you can install it and try it with our camera simulator. It is best for the most difficult acquisitions, especially in low flux conditions, from Tomography to Laue diffraction, even with multiple CCDs. It rivals powerful commercial applications, but is open source with simple scripts that can be customised for particular needs. These scripts are hidden behind the GUI of ImageJ, which makes it easy for beginners, but they can also be extended with a simple text editor. With automatic noise removal and averaging over multiple exposures, this software brings out details that might otherwise be missed.For example, a script such as Orient.vbs (or any other Windows application) can be called at the end of each image acquisition and used to re-orient the sample for Tomographic imaging. Or images from two CCDs in a Laue diffraction camera can be collected simultaneously, and automatically stitched together to provide a larger composite image.
ASCOM is an open AStronomy Component Object Model for the Windows COM environment.
ImageJ is an open Image processing application for the Java environment, and widely used by the scientific community.
FITS (Flexible Image Transport System) is an image format for scientific applications.
Select the Camera (or the Simulator).
To select a different camera, reload the ASCap script and right-click icon.
Click the images to enlarge them
Use ImageJ for all image manipulation
To enable optional lens corrections, install
SplineDeformationGenerator. (see the documentation).
Double-click mySplineDeformationGenerator.zip
& drag mySplineDeformationGenerator folder to the C:\ImageJ\plugins directory.
SplineDeformationGenerator will appear in the Plugins menu when you restart ImageJ. It will only be used if parameter K1 is set.
The latest version of ASCap.txt retries acquisition if an error is encountered. You can even unplug and replug the USB data cable and sequential image collection will usually continue.
You can change the Capture Options by right-clicking the camera icon without re-selecting the camera,
and this is usually possible even during a sequential acquisition.
ImageJ can of course be used to enhance the images in many ways. Read for example
An Introduction to Astronomical Image Processing with ImageJ.
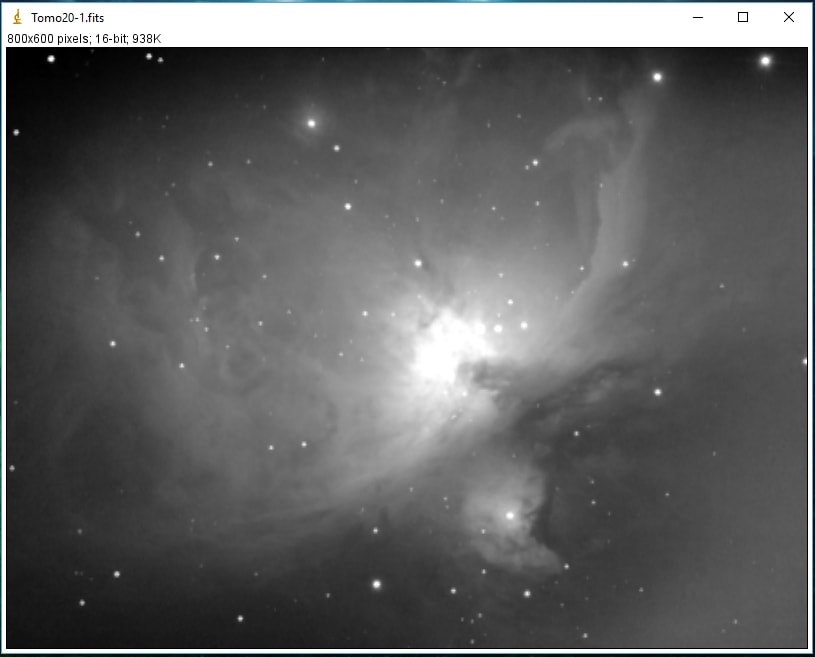
The above image is for the Camera V2 simulator. For illustration purposes, the 16-bit FITS image is compressed here to a simple JPEG screen capture.
(Click the images to enlarge).
Our cameras capture individual images in FITS 16-bit format, and ImageJ-for-ASCOM combines a series of images as a TIFF format stack. Medical tomographic software uses a similar DICOM image format, or a DIRCOMDIR format for a stack of DICOM images. You can convert TIFF images or stacks to DICOM images or DICOMDIR stacks using DICOM Im/Ex ImageJ plugins. Simple uncompressed DICOM images can be displayed by ImageJ, but the MicroDicom Viewer is needed to display DICOMDIR stacks. FITS, TIFF and DIRCOM image formats can be read by other applications such as MATLAB or OCTOPUS for tomographic reconstruction. But first read one of the free on-line books such as Principles of Computerized Tomographic Imaging and The Scientist Digital Signal Processing.
Although our cameras are supplied with 10m amplified USB extension cables, which you can chain up to 30m, you can also control your image acquisition using a Remote Desktop, from another computer or even your mobile phone. Download and install your preferred Remote Desktop from Google, Microsoft or Apple; we prefer Chrome Remote Desktop.
Confusion between 32-bit and 64-bit registration with REGSVR32 and is common.
Close other applications. If you find acquisition failing, close other applications and disconnect from the internet to improve system response on slow computers.
Eject the USB camera before disconnecting it. Even Windows-10 can sometimes lock access to a device if it has not been formally ejected before being re-connected.
Windows Defender, a Microsoft anti-virus application, can cause problems, especially if it is running with another anti-virus application
such as Microsoft Security Essentials (MSE).
If MSE is installed, uninstall and re-install it. It will then automatically disable and/or uninstall Windows Defender. Microsoft
recommends using MSE instead of Defender.
An earlier PDF version of these instructions is available.
ImageJ for ASCOM: Installation and Programming
Prefer the more compatible 32-bit version even if you have a 64-bit computer
Or just copy the ImageJ folder from the software CCD to your C:\ root directory
For slim USB NeutronOptics cameras use the version 2.2 driver dated 2012.
For high-resolution NeutronOptics cameras use the Artemis ASCOM driver
ASCOM drivers are installed in C:\Program Files (x86)\Common Files\ASCOM\Camera
For 32-bit Windows, C:\Program Files\Common Files\ASCOM\Camera
Use Control Panel/Programs to remove it. This is NOT the camera device driver
The ASCOM Profile Explorer can also be used to remove ASCOM drivers
You must ALSO install the camera device driver that comes with the camera
You can test your setup for an ASCOM Camera with the Nebulosity application
Create the "image" directory in the same folder as other ASCOM device directories
then right-click the cmd.exe program and run it as Administrator
REGSVR32 "C:\Program Files (x86)\Common Files\ASCOM\Image\FITS.dll", ENTER
Don't select a second CCD unless you have a dual-CCD camera
If it doesn't work, check your image directory and see the problems section.

Select the Camera using the ASCOM Chooser
 If no camera has already been selected, the ASCOM Camera Chooser will open.
Don't forget to click on "Properties" if you want to re-configure the camera.
If necessary, set the Camera Properties
 Camera properties depend on camera
You usually won't want to change them
This example is for the thin CCD
Logging and dumping are for debugging
x2 binning to resolution for x4 intensity
Equalise frames for interlaced cameras
Do NOT use Gaussian Blur !!
If you do, Despeckle filter won't work
As a general rule, collect raw data !
Set the Capture Options such as Exposure Time
 Right-click the camera icon to input:
A blank temperature disables cooling
2x2 binning gives a x4 intensity gain
to rotate the sample after each image.
![]()
Capturing Images by left-clicking the camera icon
After the camera and capture conditions are set by right-clicking the ImageJ camera icon,
images may be repeatedly captured and displayed simply by left-clicking the camera icon.
If a number of images are captured sequentially, they are stored in a TIFF array and averaged.
A sequential exposure loop continues until the image window is closed or the Esc key is pressed.
If the Alt key is held down, the sequence terminates after averaging.
Temperature Control and Plotting
If you have one of our cooled CCDs, you can set the temperature and plot it for each acquisition, along with the cooling power.
The menus at the bottom of the plot display a List of temperatures and allows you to Save them. The More menu allows you to change the plot scale, the axis labels, zoom to a particular region etc
Tomographic and Remote data collection
At the end of each image acquisition, a Windows routine like Orient.vbs will be launched automatically (if it exists) to re-orient the sample. You can test the example Orient.vbs, but in practice you must edit it, or replace it with some other Windows application, depending on the control software for your particular sample table, such as LabView.
A few useful ImageJ Commands
To emphasize a specific image area, select it with the rectangle tool and click "auto" Brightness/Contrast (Ctrl+Shift+C).
Potential problems with running ImageJ for ASCOM
Thanks to Michael F. Toups who on 6 June 2016 pointed out that for recent versions of Windows the image must first be written to an intermediate dimensioned image file before being read into an ImageArray. All versions of Windows are then supported.
![]()
